Tuesday, 25 February 2014

Kryolan's NEW ILLUSION range!

Kryolan are at the forefront of professional makeup, supplying top quality products to industry professionals and makeup lovers alike.

I have always been a big fan of the brand, and I love using highlighters in my work to add that gorgeous ethereal glow to skin, so I was super happy to hear Kryolan had added more amazing shades to their Illusion range. 

The first Illusion shade Velvet was launched in 2013, with rave reviews and becoming a staple in many a pros kit, the range has now been extended. The complete ILLUSION range boasts highlighters in icier shades, like ‘Satin’ and ‘Silk’, warmer & luxurious hues, like  ‘Cashmere’ and ‘Nappa’, and subtle pinks & purples, including ‘Organza’, ‘Chiffon’ and ‘Velours’.

Illusion combines raw minerals Mica and Tin Oxide to create an exquisite pearlescent effect on the skin. Kryolanchemists also added Hydrogenated Polyisobutene to the product formula, to enable MUAs to achieve that smooth, non-greasy effect.

The Illusion highlighters are a lightweight cream with a gorgeous gloss finish. They are perfect for adding that fresh, dewy glow to skin, so perfect for spring/summer. 

Use the shade of your choice on cheekbones, under brow, down the centre of the nose and the Cupid's bow to create that fresh illuminated look. I use a small duo fibre brush or a mac 217 to buff the cream into skin, using a small amount at a time, fingers also work well with the product.

They retail at £15.75 and are available at Kryolan's UK shop Charles Fox in Covent Garden soon. View the full list of stockists 
 and shades of Illusion here; http://www.kryolan.com/

The Illusion highlighters are so heavily pigmented a little goes a long way! 

I was lucky enough to try a few of the new shades, and they do not disappoint! There is a shade for every skin tone and occasion. 

I received 4 shades from the new range, as swatched below (from top to bottom)
Cashmere (a soft pinky hue)
Nappa (a warm golden tone)
Silk (a pure snowy white)
Organza (a beautiful white/purple iridescent)


As you can see from a quick swatch, these are so creamy and gorgeously pigmented! 

Get creative with them and add to the center of your eye lid, for a wide eyed look, or take one a shade lighter than your lipstick shade and press in the center of lips for a subtle ombré lip!

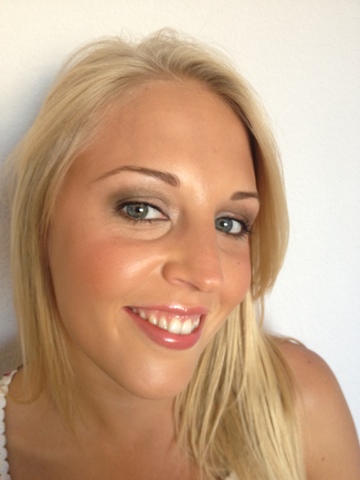
Here I am wearing silk, my personal fave as it's works so well with my very pale skin tone!

Mel
X


Sunday, 1 December 2013

How To: Your Christmas party look made easy!

Christmas season is fast approaching, and so are those Christmas Parties! Fret not, here is my guide to creating your perfect season look, that will last all night (or at least longer than your feet can in those beautiful new killer heels!)

Now like me, I'm sure you all love glitter, but unfortunately it's not always appropriate, Christmas is, however, the perfect excuse to crack that glitter open and go a bit crazy (in a grown up sophisticated way of course!).

Here's my quick and easy step by step guide to making that glitter look glam and sophisticated:

Start by using a waterproof pencil eyeliner like Urban Decay's 247 eye pencil, a black pencil will add depth to the pigment you will be using, or go bold and choose a colour pencil. Use the pencil over the whole of your eye lid all the way up to the crease. Using a waterproof and smudge proof liner like the Urban Decay one will double up as you crease free base primer.

Using a fluffy blending brush, blend the pencil upwards and out of the crease to create a soft smokey look.

Using a glitter pigment of your choice, I love Barry M's Dazzle Dusts, pack onto the lid, up to the crease, and blend any harsh lines away.

Line the lower lash line with the same eye pencil, and blend along lash line using a pencil brush dipped in a little of the same glitter pigment.

Line upper and lower waterlines with a black kohl eye pencil. Finish with a couple of coats of mascara and add false eyelashes for added drama!

Keep skin flawless, and team with a nude lip, or for the brave a bold Christmas red lip!

Here's a quick Christmas eye look I created on myself;


Merry Christmas glitter bugs!

M x


Wednesday, 27 November 2013

Your Perfect Statement Lip


The bold statement lip has been a must have accessory for a while now, with bright Reds, vibrant Oranges and Pinks being sported by anyone who's anyone. This Autumn Winter season is still all about the bold lip, turning to more deep plums/burgundy and berry shades as seen at Marni, Prada & Louis Vuitton. However, fret not red lippy lovers, the
red lip isn't going anywhere, as was seen yet again at shows such as La Perla, Marc Jacobs & by far the boldest at Nina Ricci.

For bold lips, keep skin fresh, flawless and dewy, teamed with well groomed/defined brows, and just a slick of mascara. Or if you want that vampy look, team your burgundy lips with a smokey eye!

Here are my top tips for the perfect long-lasting bold lips;

- Start by exfoliating lips, using a soft baby toothbrush to gently remove any dry skin.

- Follow this by applying a good nourishing lip balm, I love Carmex balms. Leave to soften lips for 5 -10 mins, then blot excess balm with a tissue.

- Taking a concealer the exact colour match of your skin, conceal your lips and outer lip edge, this will allow the true colour of your 
lipstick to show, cancelling your natural lip colour which can alter your chosen lipstick shade.

- Use a lip barrier pencil, like Urban Decays Ozone lip liner, around the outer edge of your lips to prevent bleeding and feathering.

- Using a lip liner the exact match of your chosen lipstick shade, line your lips and fill in, using the lip liner to colour the whole of your lips.

- Using your chosen lipstick shade apply to your lips with a lip brush, I prefer an angled synthetic brush which allows you to create sharpe defined edges. Blot with tissue and re-apply! Voila perfect bold AW13 lips that last all day!

Here are some pictures from my latest beauty shoot, where I used bold lips to steal the show!
Photographer; Ursula Roxy
Makeup Artist; Melanie Brown
Model; Killa @ Leni's Model Management


Sunday, 10 November 2013

Perfume for your hair?!


We all wear perfume on a daily basis, but not many of us have heard of a perfume specifically made for your hair...

...Introducing Herra Hair Protect, a clever little spray which not only provides your hair with a gorgeous scent, but also protect your hair from pollution, UV and free radicals. It's also paraben free, a big plus in my books!

I have been using this product for the last couple of weeks, and what instantly hit me was the gorgeous fresh, almost aromatheraputic scent with notes of vanilla, bergamot and sandalwood. 

Using 2-3 sprays at arms length through the length of your hair after a blow dry helps your blow dry last that precious bit longer. This spray is lightweight and not at all greasy, meaning you can spray throughout the day as often as you wish for a refreshing uplift.

• Protection – Sunflower extract protects the structure of the hair, provides UV protection and helps prevent hair colour fade, whilst olive fruit extract is rich in antioxidants that help protect against pollution and free radicals. Paraben free.

• Moisturisation – Glycerin helps provide ample hydration and seals in moisture, without weighing down the hair.

• Fragrance – The Herra signature fragrance is a blend of the finest key notes creating a fresh, modern, uplifting experience that appeals to all. Ingredients include Italian bergamot, loquat fruit, midnight orchid, rose, white jasmine, mimosa, heliotrope, lily, vanilla, tonka bean, sandalwood and musk.

Priced at £24.99 for 50ml this may seem a bit pricey, however you only need to use a small amount meaning this chic bottle lasts a good while, and looks fab on your dresser!

Since using my hair seems more shiny, and nourished. I have had also had lots of comments on my hair smelling so good, which is super important seeing as my job involves me being up close and personal with clients! 

Would you use a hair perfume? Let me know..

M x

Tuesday, 25 September 2012

The Cost Of Beauty - Truth behind animal testing

Most of you are probably unaware as to the true extent of animal testing in the cosmetics industry, like myself. I was ignorant, and until doing some research did not realise animal testing was still so prominent within the industry, like I did, you may think animal testing is a thing of the past.

Think again! Huge companies like Mac, L'Oreal, Estée Lauder, Johnson and Johnson just to name a couple still use animal testing for their products. You can find a complete list of companies that do use animal testing here; http://www.peta.org/living/beauty-and-personal-care/companies/default.aspx

What is Animal Testing?
Animal Testing is carried out by certain companies to test the safeness of products for humans. Animals like rabbits are often subject to extremely painful and often lethal tests, which include toxic substances being placed in the eyes of rabbits. The rabbits often scream out in pain and end up breaking their necks and backs in an effort to escape. Lethal Dosage (LD) test are carried out on the animals to test the dosage of the toxins that proves lethal, leading to the death of numerous animals. Often painful and slow deaths.
Other tests include force feeding rats chemicals, known for causing cancer, for 2 years to see if they get cancer, then either way they are all destroyed.

Why Animal Test?
Companies have a responsibility to ensure products are safe to consumers, however animal testing has been proved irrelevant. A test on a mouse, for example, will have different results than a test on a rat, therefore how can this be translated to the result on humans? DNA between species vary hugely and tests on different sexes of animals also affect test results, therefore results of the tests on animals do not reflect the result the product will have on humans. Products sold and manufactured in China are by law required to test on animals, a country which saw an increase in profit in the beauty industry of 18% last year, taking profits to £10 billion, making it a lucrative business with many cosmetics companies happily ditching their cruelty free logos to sell products in China.

There are better alternatives.
With modern technology their are more humane and effective tests that companies can use. For example, synthetic membranes grown by artificial means, which provide better results in relation to human reactions to cosmetics ingredients. With technology as advanced as it is in this day and age there is simply no reason or excuse for animal testing.

What can you do?
Whilst people are still purchasing products from companies who use these barbaric test, companies will continue to animal test. It may be that people are unaware, or don't like to think about it (ignorance is bliss!) but by boycotting companies who still use animal testing we can put a stop to this unjust cruelty. I will be boycotting these companies now, until their ethos on the matter changes!

You can also sign a petition and learn more about the 'Cruelty Free Campaign' here; http://www.crueltyfreeinternational.org/en/the-issue

And spread the word, people should be aware of what their hard earned money is funding when buying cosmetics!

Look out on products for the 'leaping bunny' logo below. This is issued by the CCIC (The Coalition for Consumer Information on Cosmetics) to companies who comply with the cruelty free regulations.

It up to you who you purchase your products from but everyone should be aware of exactly what their money is funding.

I'm sorry but I have to add some horrid pics below to really highlight this plight!

For continued info see the following links;

http://www.crueltyfreeinternational.org/en/the-issue

http://www.peta.org/living/beauty-and-personal-care/companies/default.aspx


Monday, 10 September 2012

Sunkissed Beauty - Bridal Look

I was contacted by the lovely guys at Sunkissed Beauty about taking part in their new competition to create a Bridal look using their products. The competition entries are a range of makeup artists and beauty bloggers, showing just how many looks can be created with the versatile products!

The products used for this competition consist of;
Beyond Bronze Flexi Cosmetics Kit - £14.99
Sunkissed Jumbo Bronzing Pearls - £2.50
Sunkissed Cosmetic Bronzing Brush - £3.49
All available at www.sunkissedbronzing.co.uk

As you can see the products are really good value, and of a very good quality. I loved the Bronzing Pearls, and the Beyond Bronze Flexi Kit has a great range of products and colours and is an absolute bargain! The Shadows within the kit are highly blendable and offer really good pigment payoff, I loved these shadows!

Below are the pics of the look I created on my friend Tanya Shepherd. Here is a run down of how I created this look!

Face;
Skin was prepped and primed using Dermalogica. I then evened out skin tone using Makeup Forever HD foundation mixed with Mac Strobe Cream for luminosity. Base was set with Makeup Forever translucent powder.

Eyes;
Using the gold/brown trio from the Sunkissed Beyond Bronze Flexi Cosmetic Kit, I swept the middle golden shade on the lid up to the crease then blende shadow upwards and outwards. Then using darkest shade I blended this into the crease and outer corner of eyelid to add depth and definition to the eye, ensuring this was well blended. I then used the lightest shade as a highlighter on the inner corner of the eye and underneath the brow bone. Taking again the darkest shadow shade I swept this under the eye thinly along the lash line and then did the same for the upper lash line to define eyes. Eyelashes were curled and two coats of the Mascara from the kit were coated onto top and bottom lashes, ensuring good separation of lashes.

Blush/Bronze;
Using the Bronzing Pearls and Bronzing Brush I swept the Bronzer anywhere the sun naturally hits your face, forehead, nose, cheeks etc. I then added the Peachy Pink Blusher from The Beyond Bronze Kit to the apples of the cheeks sweeping up towards the hairline. I then used a highlighter around the temples, centre of forehead, downwards along the very centre of the nose and Cupids bow.

Lips;
Using the pink peach lipstick shade from the Beyond Bronze Kit I applied to lips lightly for a natural hint of gloss and colour

Hope you like the look I created! Please take a second and click vote on my picture if you do! It takes less than 10 seconds.. Here is the link; http://www.sunkissedbronzing.co.uk/wedding_look

If I win I will be doing a Sunkissed Cosmetics giveaway so keep voting and keep a look out!

Mel
X

Saturday, 1 September 2012

Paris Beauty Bargains!

Now I know there are a fair few posts out their about makeup/cosmetic shopping in Paris, so I'm not going to do a big blog repeating info that's already out there, I just want to share the products I love, and that I found were worth a purchase!

Now I visited the Cite Pharma, Rue 4 in Saint Germain to purchase these goodies, which I found to be the best value for money.

Here are some of the products I purchased;

Bioderma Crealine - €15.90 for two 500ml bottles;
A Makeup Artist's absolute essential, especially loved at Fashion Weeks. This is a hardworking cleanser that quickly rids skin of makeup and dirt, and is suitable for all skin, so gentle and water-like it's a treat for sensitive skin.

Embryolisse Lait-Crème Concentré - €18.30 for two 75ml
This hydrating Moisturiser is an absolute must in my kit. It combats very dry skin, without being too oily. It's a beautifully hydrating base for makeup application.

Caudalíe - Eau De Beautè - €8.90 for 30ml
This is a refreshing mist spray, and is an absolute treat to skin. Used as a refreshing toner, or over makeup as a face freshener. This product also contains natural plant and fruit extracts which means its aromatherapy properties wake up your senses too.

Homeoplasmine - approx €5
This is actually more commonly used a treatment cream for irritated skin, (some call it nipple cream!) but this product is used by Makeup Artists as an amazing chapped lip and dry skin cream!

Here's a pic of my Paris haul..