Showing posts with label makeup artist. Show all posts

Tuesday, 25 February 2014

Kryolan's NEW ILLUSION range!

Kryolan are at the forefront of professional makeup, supplying top quality products to industry professionals and makeup lovers alike.

I have always been a big fan of the brand, and I love using highlighters in my work to add that gorgeous ethereal glow to skin, so I was super happy to hear Kryolan had added more amazing shades to their Illusion range. 

The first Illusion shade Velvet was launched in 2013, with rave reviews and becoming a staple in many a pros kit, the range has now been extended. The complete ILLUSION range boasts highlighters in icier shades, like ‘Satin’ and ‘Silk’, warmer & luxurious hues, like  ‘Cashmere’ and ‘Nappa’, and subtle pinks & purples, including ‘Organza’, ‘Chiffon’ and ‘Velours’.

Illusion combines raw minerals Mica and Tin Oxide to create an exquisite pearlescent effect on the skin. Kryolanchemists also added Hydrogenated Polyisobutene to the product formula, to enable MUAs to achieve that smooth, non-greasy effect.

The Illusion highlighters are a lightweight cream with a gorgeous gloss finish. They are perfect for adding that fresh, dewy glow to skin, so perfect for spring/summer. 

Use the shade of your choice on cheekbones, under brow, down the centre of the nose and the Cupid's bow to create that fresh illuminated look. I use a small duo fibre brush or a mac 217 to buff the cream into skin, using a small amount at a time, fingers also work well with the product.

They retail at £15.75 and are available at Kryolan's UK shop Charles Fox in Covent Garden soon. View the full list of stockists 
 and shades of Illusion here; http://www.kryolan.com/

The Illusion highlighters are so heavily pigmented a little goes a long way! 

I was lucky enough to try a few of the new shades, and they do not disappoint! There is a shade for every skin tone and occasion. 

I received 4 shades from the new range, as swatched below (from top to bottom)
Cashmere (a soft pinky hue)
Nappa (a warm golden tone)
Silk (a pure snowy white)
Organza (a beautiful white/purple iridescent)


As you can see from a quick swatch, these are so creamy and gorgeously pigmented! 

Get creative with them and add to the center of your eye lid, for a wide eyed look, or take one a shade lighter than your lipstick shade and press in the center of lips for a subtle ombré lip!

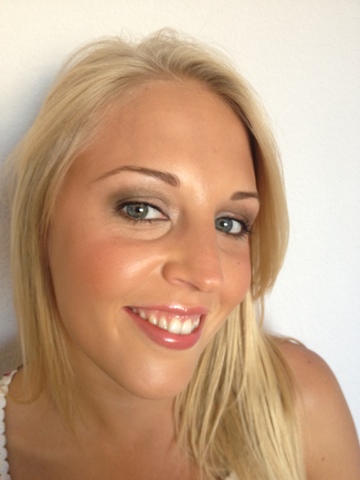
Here I am wearing silk, my personal fave as it's works so well with my very pale skin tone!

Mel
X


Sunday, 1 December 2013

How To: Your Christmas party look made easy!

Christmas season is fast approaching, and so are those Christmas Parties! Fret not, here is my guide to creating your perfect season look, that will last all night (or at least longer than your feet can in those beautiful new killer heels!)

Now like me, I'm sure you all love glitter, but unfortunately it's not always appropriate, Christmas is, however, the perfect excuse to crack that glitter open and go a bit crazy (in a grown up sophisticated way of course!).

Here's my quick and easy step by step guide to making that glitter look glam and sophisticated:

Start by using a waterproof pencil eyeliner like Urban Decay's 247 eye pencil, a black pencil will add depth to the pigment you will be using, or go bold and choose a colour pencil. Use the pencil over the whole of your eye lid all the way up to the crease. Using a waterproof and smudge proof liner like the Urban Decay one will double up as you crease free base primer.

Using a fluffy blending brush, blend the pencil upwards and out of the crease to create a soft smokey look.

Using a glitter pigment of your choice, I love Barry M's Dazzle Dusts, pack onto the lid, up to the crease, and blend any harsh lines away.

Line the lower lash line with the same eye pencil, and blend along lash line using a pencil brush dipped in a little of the same glitter pigment.

Line upper and lower waterlines with a black kohl eye pencil. Finish with a couple of coats of mascara and add false eyelashes for added drama!

Keep skin flawless, and team with a nude lip, or for the brave a bold Christmas red lip!

Here's a quick Christmas eye look I created on myself;


Merry Christmas glitter bugs!

M x


Wednesday, 27 November 2013

Your Perfect Statement Lip


The bold statement lip has been a must have accessory for a while now, with bright Reds, vibrant Oranges and Pinks being sported by anyone who's anyone. This Autumn Winter season is still all about the bold lip, turning to more deep plums/burgundy and berry shades as seen at Marni, Prada & Louis Vuitton. However, fret not red lippy lovers, the
red lip isn't going anywhere, as was seen yet again at shows such as La Perla, Marc Jacobs & by far the boldest at Nina Ricci.

For bold lips, keep skin fresh, flawless and dewy, teamed with well groomed/defined brows, and just a slick of mascara. Or if you want that vampy look, team your burgundy lips with a smokey eye!

Here are my top tips for the perfect long-lasting bold lips;

- Start by exfoliating lips, using a soft baby toothbrush to gently remove any dry skin.

- Follow this by applying a good nourishing lip balm, I love Carmex balms. Leave to soften lips for 5 -10 mins, then blot excess balm with a tissue.

- Taking a concealer the exact colour match of your skin, conceal your lips and outer lip edge, this will allow the true colour of your 
lipstick to show, cancelling your natural lip colour which can alter your chosen lipstick shade.

- Use a lip barrier pencil, like Urban Decays Ozone lip liner, around the outer edge of your lips to prevent bleeding and feathering.

- Using a lip liner the exact match of your chosen lipstick shade, line your lips and fill in, using the lip liner to colour the whole of your lips.

- Using your chosen lipstick shade apply to your lips with a lip brush, I prefer an angled synthetic brush which allows you to create sharpe defined edges. Blot with tissue and re-apply! Voila perfect bold AW13 lips that last all day!

Here are some pictures from my latest beauty shoot, where I used bold lips to steal the show!
Photographer; Ursula Roxy
Makeup Artist; Melanie Brown
Model; Killa @ Leni's Model Management


Sunday, 10 November 2013

Perfume for your hair?!


We all wear perfume on a daily basis, but not many of us have heard of a perfume specifically made for your hair...

...Introducing Herra Hair Protect, a clever little spray which not only provides your hair with a gorgeous scent, but also protect your hair from pollution, UV and free radicals. It's also paraben free, a big plus in my books!

I have been using this product for the last couple of weeks, and what instantly hit me was the gorgeous fresh, almost aromatheraputic scent with notes of vanilla, bergamot and sandalwood. 

Using 2-3 sprays at arms length through the length of your hair after a blow dry helps your blow dry last that precious bit longer. This spray is lightweight and not at all greasy, meaning you can spray throughout the day as often as you wish for a refreshing uplift.

• Protection – Sunflower extract protects the structure of the hair, provides UV protection and helps prevent hair colour fade, whilst olive fruit extract is rich in antioxidants that help protect against pollution and free radicals. Paraben free.

• Moisturisation – Glycerin helps provide ample hydration and seals in moisture, without weighing down the hair.

• Fragrance – The Herra signature fragrance is a blend of the finest key notes creating a fresh, modern, uplifting experience that appeals to all. Ingredients include Italian bergamot, loquat fruit, midnight orchid, rose, white jasmine, mimosa, heliotrope, lily, vanilla, tonka bean, sandalwood and musk.

Priced at £24.99 for 50ml this may seem a bit pricey, however you only need to use a small amount meaning this chic bottle lasts a good while, and looks fab on your dresser!

Since using my hair seems more shiny, and nourished. I have had also had lots of comments on my hair smelling so good, which is super important seeing as my job involves me being up close and personal with clients! 

Would you use a hair perfume? Let me know..

M x

Monday, 10 September 2012

Sunkissed Beauty - Bridal Look

I was contacted by the lovely guys at Sunkissed Beauty about taking part in their new competition to create a Bridal look using their products. The competition entries are a range of makeup artists and beauty bloggers, showing just how many looks can be created with the versatile products!

The products used for this competition consist of;
Beyond Bronze Flexi Cosmetics Kit - £14.99
Sunkissed Jumbo Bronzing Pearls - £2.50
Sunkissed Cosmetic Bronzing Brush - £3.49
All available at www.sunkissedbronzing.co.uk

As you can see the products are really good value, and of a very good quality. I loved the Bronzing Pearls, and the Beyond Bronze Flexi Kit has a great range of products and colours and is an absolute bargain! The Shadows within the kit are highly blendable and offer really good pigment payoff, I loved these shadows!

Below are the pics of the look I created on my friend Tanya Shepherd. Here is a run down of how I created this look!

Face;
Skin was prepped and primed using Dermalogica. I then evened out skin tone using Makeup Forever HD foundation mixed with Mac Strobe Cream for luminosity. Base was set with Makeup Forever translucent powder.

Eyes;
Using the gold/brown trio from the Sunkissed Beyond Bronze Flexi Cosmetic Kit, I swept the middle golden shade on the lid up to the crease then blende shadow upwards and outwards. Then using darkest shade I blended this into the crease and outer corner of eyelid to add depth and definition to the eye, ensuring this was well blended. I then used the lightest shade as a highlighter on the inner corner of the eye and underneath the brow bone. Taking again the darkest shadow shade I swept this under the eye thinly along the lash line and then did the same for the upper lash line to define eyes. Eyelashes were curled and two coats of the Mascara from the kit were coated onto top and bottom lashes, ensuring good separation of lashes.

Blush/Bronze;
Using the Bronzing Pearls and Bronzing Brush I swept the Bronzer anywhere the sun naturally hits your face, forehead, nose, cheeks etc. I then added the Peachy Pink Blusher from The Beyond Bronze Kit to the apples of the cheeks sweeping up towards the hairline. I then used a highlighter around the temples, centre of forehead, downwards along the very centre of the nose and Cupids bow.

Lips;
Using the pink peach lipstick shade from the Beyond Bronze Kit I applied to lips lightly for a natural hint of gloss and colour

Hope you like the look I created! Please take a second and click vote on my picture if you do! It takes less than 10 seconds.. Here is the link; http://www.sunkissedbronzing.co.uk/wedding_look

If I win I will be doing a Sunkissed Cosmetics giveaway so keep voting and keep a look out!

Mel
X

Thursday, 30 August 2012

Japonesque's pretty Safari NEW range!

If you haven't heard of Japonesque, they are a US professional, high quality brand who make a makeup artists job that much easier, and kits that bit prettier! They also make brushes for brands such as MAC.

I love Japonesque brushes and amazing storage containers like the fabulous lip palette which helps condense all many lipsticks in one handy compact case.

Japonesque has branched out to the UK and products are now available at Boots, John Lewis and HQ Hair. You can also view and purchase online direct at www.japonesque.com

So I was excited to be sent some brushes from the new 'Safari' range from Japonesque. The new brushes not only look absolutely beautiful and brighten up any makeup bag, they are a pleasure to apply makeup with.

The new brushes consist of animal print designs and are synthetic and animal friendly!

I love the super-luxe Bronzer brush, it applies powders and bronzers evenly, blending makeup beautifully, plus its compact enough to carry around for touch ups on the go and to show off it's chic design to the envy of your friends!

See the pics below of the new range and grab them whilst their still around, they are selling fast!

Super-luxe Bronzer brush - £19.50
Safari Brush set - £28 (includes Powder Brush, Shadow Brush and Crease Brush contained in a Microfibre case)


Monday, 2 July 2012

My Top Ten Beauty Must Haves!

As a self confessed beauty and makeup junkie, I have tried a ridiculous amount of potions and lotions so those that make it into my regular beauty regime have to be pretty special!

So here's a little peek into the products I use regularly;

1) St Ives Apricot Facial Scrub
I love this facial exfoliator, it buffs and scrubs away dead skin cells and impurities to leave skin feeling fresh and clean! It's gentle enough to be used everyday if your skins requires, and has a lovely apricot scent! Exfoliation leaves skin nicely prepped for makeup application.

2) Carmex Cherry Lipbalm
I am totally addicted to this Lipbalm, and use it both personally and on client/models lips. It instantly hydrates lips, and has a gorgeous smell. It's also non sticky but leaves a lovely glossy sheen on lips. This amazing balm is SPF 15, so it also protects your lips.

3) Bioderma Crealine
This makeup remover/cleanser is a cult favourite of makeup artists, and for good reason. The gentle makeup remover basically melts away makeup, but is as gentle on the skin as water. It leaves skin cleansed, refreshed and makeup free in minutes! I love using this for myself, and is a staple in my kit at fashion shows to cleanse and revive the models face when the skin is feeling a little worse for wear after constant makeup application and removal.

4) Makeup Forever HD Translucent Powder
I have oily skin, which is much the blight of many, so if your skin is like mine, you will be well aware of the annoyance of a shiny T-Zone appearing an hour or so after makeup application. I use this product lightly on my oily prone areas after foundation and concealer application concentrating mainly on forehead, nose, chin and under eyes to set concealer. This powder is so fine and invisible, it avoid making makeup cakey, which is not a good look! I also use Kleenex Blotting sheets and a little more powder during the day as needed!

5) MUA Cosmetics Eye Shadow Primer
I swear by this amazing product! Used under eyeshadow it primes the eye for shadow application, and stops eyeshadow from creasing! It also adds depth to shadow colour and eliminates discolouration of eyelids. I use this daily, and it prevents creasing for at least 10 hours! This product is a bargain at £2.50, and rivals more expensive primers I have used in the past.

6) Aussie 3 Minute Miracle Conditioner
If your like me and are constantly using heated hair styling products, hair dye and the like, your hair will start to show the strain. Using this intensive conditioning treatment restores shine and the condition of your hair, it also smells like bubblegum! Lush!

7) Palmer Cocoa Butter Body Lotion
I love this amazing body moisturiser for instant skin rehydration. It also smells delicious! For added moisture use straight after a bath or shower!

8) Biore Pore Strips
These pore strips are designed either for nose, chin or forehead. They cleverly remove blackheads and impurities from blocked pores, this therefore also prevents spots! I use once a week on problem areas.

9) Shu Uemura Eyelash Curlers
These are the best eyelash curlers you can buy and are a firm favourite with makeup artists. They curl even the most stubborn eyelashes. Use prior to mascara, and curl lashes at base, middle and end of lashes for a natural rounded curl.

10) E45 Cream
I love this cream for dry skin, it instantly hydrates skin, and is for use on face and body. I also on dry elbows and knees when needed. I always carry this product in my kit.

Mel
xXx


Tuesday, 26 June 2012

Charles Fox Marathon Masterclass

I was lucky enough to be one of the select few Makeup Artists to be invited to the Charles Fox Marathon Masterclass, so for those who weren't there, I thought I'd provide a little glimpse of what happened!

The Masterclass was held by the fantastic team at Charles Fox at the beautiful Royal Opera House. The event was filled with amazingly talented Makeup Artists at the top of their fields giving demonstrations on lots of different areas of makeup over the two days the event was held.

I attended Saturday's Masterclass which started the day of with Makeup Artist Chris Dennis who was demoing Drag Makeup - which I personally love!

Chris Dennis' client base include Pamela Anderson, Cherie Blair and Julie Walters to name just a couple, as well as working at fashion week on shows for Vivienne Westwood and Amanda Wakely amongst many others.


Chris demonstration blocked brows stubble colour correction and how to get that Drag makeup exaggerated eye, incorporating lots of colour and glitter! What's not to love! 


Second demonstrator was Liz Bylett, who demonstrated some amazing Body Paint. Liz is the founder of Foillies Face and Body paint, and as well as providing her services to clients including Richard Branson, she is also competing in the UK's body paint competition next month. Liz created a Great Britain inspired look using aqua colours and lots of glitter!!


Next up was Lan Nguyen, who is known for her amazing crystal and glitter looks. Lan specialises in Fashion, heading up many shows for London Fashion Week, as well as providing makeup for her celeb client base.

Lan Demoed 3 high fashion makeup looks, using lots of glitters, crystals and greasepaint's!


Stuart Bray was up next, Stuart is a Special Effects (SFX) artist who has worked on films such as 'Shaun of the Dead' and 'Saving Private Ryan'. Stuart demonstrated a Zombie look, using latex pieces, and lots of fake blood!!


Last but by no means least was James Vincent, Makeup Artist to the Stars! James has worked with top celebs like Lady Gaga and Kristen Stewart!

James Demo'd 3 looks based on looks he did on 3 very well know faces! 1st was Florence Welch, 2nd Kirsten Stewart and 3rd Ana Matronic (Scissor Sisters).


Huge thanks to everyone who worked so hard to make the event so amazing... Paul Merchant and the team at Charles Fox, all of the amazing artists who gave amazing classes, Joey Bevan Stylist - Assistant Angela Gates, Hair by Kasia Fortuna & Spencer Silver. 
Also the photographers who got some amazing shots from the event you can check out; Martin Higgs, Gary Nunn and HelenShotMe
Film Maker: Paul Bates - Assistant; Adam Galways

Tuesday, 5 June 2012

Red lips that suit YOU!

I love love love a red lip, it has a real Hollywood glamour feel, and can make you instantly feel fab and more confident!

If you think you can't, or are a bit weary of wearing a red lip, think again.. As long a you choose the right shade for you, anyone can pull it off, and I'm here to help you find your perfect shade!

The Right Red for YOU!
There are so many shades of reds with many different undertones etc, so which one to pick?

Firstly you need to know whether your skin has Pink or Yellow (Cool or Warm) undertones. If your not sure, there is an easy way to tell..

Check your wrists or arms, where your veins are visible, if your veins are mainly green, then your undertones are yellow (warm) if your veins are mainly blue the your undertones are pink (cool). If your a mixture of both then your neutral toned!

Yellow (warm) undertones:
The best reds for warm undertones are Orangey Reds, Warm Reds, Brown and Golden Based Reds

My Favourite; Estée Lauder Spanish Red

Pink (cool) undertones:
Pink Tones Reds, Berry and Plum Shades, and Blue based Reds.

My favourite; Mac Russian Red - This is a Blue based red.

*Blue based reds will also give the Illusion of Whiter teeth!

*If you have small lips, avoid the darkest shades of red, as these will make your lips look smaller.

If your still not sure a red lipstick is for you, try a lip stain first, such as Benefit Benetint!

So go on get the right red lippy, and see how it makes you feel!

MWAH!

Mel
X

Tuesday, 10 April 2012

Review and Swatches of New Revlon Lip Butters!

With many rave reviews and buzz on Revlons new lip butters, I had to see what all the fuss was about, and these beautiful lipstick balms do not disappoint!

The lip butters offer great pigmentation and colour density with a shine, and double up as a hydrating balm for your lips.. With great colour and lip softening ingredients everyone is a winner!

The product is also relatively long wearing for a balm, lasting between 2-3 hours, which is also a plus.

These are a must for fellow Makeup Artists kits, as well beauty lovers alike!

They retail at £7.99 and are currently on offer of 3 for 2 at Boots. There are a wide range of shades so there is a shade to suit all..

I went for some bright on trend summer shades, swatches below, from left to right; 035 Candy Apple, 075 Lollipop and 015 Tutti Frutti.

Love the packaging which is coloured to match the butters, making it easy to find the colour I need when in a rush on set! I shall definately be expanding my collection!

Mel
X

Friday, 30 March 2012

A great year to be British!

So 2012 is set to be a great year for us Brits, what with London hosting the Olympics and the Queens Diamond Jubilee! In such tough economic times, it's great to celebrate being British, and it truely feels like a sense of patriotism is being restored with such events!

To celebrate the upcoming events I wanted to do a beauty shoot... So here are the results...

Products used;
Face
Mac Studio Fix mixed with Shu Uemura UV base.
Bobbi Brown Correctors and Concealers.
Makeup Forever HD translucent setting powder.
MUA Bronzer and Blusher in English Rose.
Mac Vanilla Pigment used for highlighting.

Eyes
Mac Kohl Eye Liner in Smolder set with a mixture of Sleek matte black eyeshadows.
Shu Uemura eyelash curlers used and lashes set with 2 coats of Dior Show Mascara.
Eyebrows set and defined using Bobbi Brown Pencil and shadows.

Lip
Violent Lips Tattoo, set with Ben Ny paints.

Photography; Kaye Ford
Model; Stacey @ Leni's Model Management

Hope you like!
Mel
X

Friday, 9 March 2012

Ethereal Shoot at Hyde Park

Wanted to share with you one of most favourite's shoots!

Teaming up with talented Photographer Hannah-Beth Todd, we shoot this at Hyde Park in London, on a beautifully sunny September day.

Hannah has a beautifully personal photography style which really creates a mood a feel to the photos. We wanted to create something almost dream like, girlie, soft and beautiful.. Which I think we did!

How I created the look;

Base was soft, matte and natural, using Mac Face and Body, Makeup Forever HD setting power, and natural highlights around temple, Cupids bow, centre of nose, using Mac pigment in Vanilla.

Blush was Bobbi Brown in pale pink and slopes. Used lightly to recreate a natural skin hue across apples of cheeks and blended outwards.

Eyes were left very natural, almost a no makeup look, brows were naturally filled with featured brush strokes, and further brushed through with a clean brush. Lids were evened out with a Mac Paint Pot in Soft Ocre. Lashes were curled and set with a brown mascara on top and bottom lashes. A beige eye pencil was then used on waterline to brighten and open eyes.

Lips were the main focus of the look, OCC lips tars were mixed to create bespoke colours for each girl, pigment was then pressed onto lips to mattify and create a slight two tone lip on a couple of shots.

Hope you like!

Mel
X


Thursday, 1 March 2012

Photoshoot with Adam Goodwin and Kat @ Profile and Fords

Here are some images from a shoot I did with the talented photographer Adam Goodwin. Model is Kat @ Profile models and Fords.

For this look, I used Mac Face and Body foundation as the model had such beautiful skin. I wanted a fresh natural coverage so face and body is perfect. For concealing I used Bobbi Brown creamy concealers and a corrector for under eye area.

Blush was left natural with some contouring under cheekbone. I used Bobbi Brown blusher in Slopes and contouring was a matte Bobbi Brown eyeshadow mix to match models skin tone.

Smokey eyes were created used Mac Smolder eye pencil on upper and lower lash line blended upwards and outwards for a winged cat eye shape. I then used Sleeks Storm I-Divine pallette using the vanilla colour in the inner corner of eye to open up eyes. I then used the black colour to set liner on top and bottom blending to a gradual fade upwards and outwards. I then used the smoulder pencil on the lower and upper waterlines of eyes. After curling lashes I applied 2 coats of Maybeline volumising mascara in black.

Lips were left with a natural gloss using Vaseline mixed with a dab of Bobbi Brown pot rouge.

Hope you like!

Mel
X

London Fashion Week Feb 2012

Hi All,

This is my first blog post EVER! So I thought I'd start with a good'un and take you behind the scenes at London Fashion Week where I had the pleasure of working a few weeks ago...

The first show I worked was the amazing "Corrie Nielsen" AW12 show, one of the first shows kicking off London Fashion Week. My morning started with an early wake up of 4.30am, when I then made my way excitedly and heavy makeup kit in tow to Somerset House for the show.

Arriving and being ushered backstage to set up, the area was beginning to fill with dressers, photographers, hair stylist etc, all busily rushing to prepare the models for the show. The atmosphere backstage is always buzzing and filled with creativity!

The key artist for the show was Yin Lee, a super talented MUA, who designed the makeup look for the show taking into account the gorgeous Tartan adorned designs. After a briefing from Yin myself and my fellow makeup artists were off making up the gorgeous array of models!

The makeup for the show was..
  • A beautiful, flawless and fresh face, I used Mac Studio Fix with a few drops of Mac Lustre Drops.
  • Exaggerated peach/orange was used for a blush that extended to the temple.
  • Neutral eyelids - using a Mac Paint Pot with a very thin -barely there, eyeliner on the upper lash.
  • Lips were a bold red, made using a mix of OCC Lip Tars, Mac Paint Pots and a dark shade of foundation.
  • The face was finished with an adhesive lace applied to the models forehead, created by the amazing Face Lace - http://face-lace.com/

The show was amazing and I loved every minute of it, and here are some pictures, hope you like!....